Thursday 11 July 2013

Data Connection in InfoPath 2010

In a previous post I covered how to create an external content type and expose the data in a SharePoint list (External List).

In some cases simply exposing the data from a backed data source in the SharePoint list may be enough to meet your requirements.

However you may need to take it a step further and use the external list data to populate the choices for another field in a different SharePoint list.

A good example of this would be a list of customers, the list may be maintained centrally in for example a SQL database. Rather than duplicate that list and maintain two sources you can simply create an external content type and an external list to pull that data in to SharePoint.

Now the data is in SharePoint I may have another list that for example logs sales enquiries, on logging an item in this list I want to have a drop down to choose from for the list of customers.

If the list of customers is stored in a SharePoint list via the external content type, all I need is a data connection within InfoPath for the list to populate the choices with the customers data from the list.

If using the SharePoint as the central location for storing the data then you can ignore the reference to the external content type and just use the data connection in InfoPath to display the data from the SharePoint list in exactly the same way.

The context of the example below is of the customer names list I mention above.

So assuming you have your external list with the data required created, open the list we want to add the cutomers drop down field to in InfoPath.


Under the data tab select "From SharePoint List", you can see there is also the option to pull data from web services.


Select the site in which your external list containing the customer data lives.


Select the SharePoint list containing your data


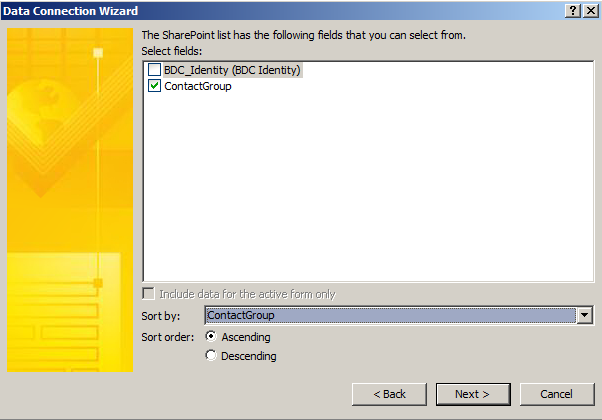
Select the column you wish to use, in my case I only have one field but if the cusomer contact had multiple fileds like name/address/telephone I would only choose the customer name as thats the data I want to use in my drop down.


Name the data connection (you will see this name displayed in InfoPath when connecting to the data source).


Depending on where your SharePoint lists are stored - e.g if the data connection is connecting to alist in another web application you may need to convert your data connection to a connection file.

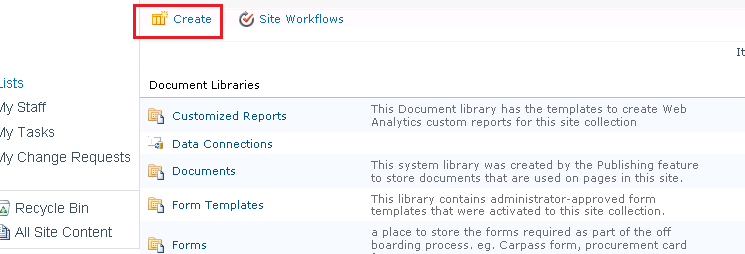
You will need to create a data connection library first - the out of the box template will be available under libraries.


Paste the URL of your data connection library and add the name your connecton file on the end followed by .udcx


You should also check your InfoPath Forms Services settings in Central Admin and enable "Allow cross domain data-access"

This all depends where the data you are connecting to is residing.


Now you have a data connection to the SharePoint list containing the data, create a field to display the choices.


Open the field properties and select the option "Get choices from an external data source"


From the data source drop down, select the data source just created to the SharePoint list.


Ensure "Value" and "Display name" are set to the column you want to display in the field.


Yoour drop down filed or multiple-selection filed will now contain choices pulled from the SharePoint list data connection.

A simple way to use centrally managed data (either managed directly in a SharePoint list or external data source) in multiple lists, removing the need to maintain any given list of data in multiple locations.

Thanks for reading,

Matt

Thursday 4 July 2013

SharePoint 2010 External Content Type & External List

I have recently worked on a project where a requirement was to pull a column of data from a SQL server database and display this in a SharePoint list.

It's a fairy common requirement and using SharePoint external content types we can easily achieve this.

I am going to assume you have a table of data in mind within a SQL server database that you have permissions to.

I am also assuming you have the Business Data Connectivity Service configured and the Secure Store Service application configured with a target application ID we can use to access the SQL server database.

If you need guidance on configuring the Secure Store - See Here


Open SharePoint Designer 2010 and open your site you wish to create the external content type on.

On the left hand navigation select "External Content Types" .

Click on the top left ribbon icon to create a new content type.


Name the content type

Click on the link highlighted to connect to a data source


Click on “Add Connection”

Select “SQL Server” as we are using a SQL database, you could use a different data source type.


Provide the server name/alias and the database name.

To use "Connect with User's Identity" as I am you will need to have permissions to the database, if you do not you can use the Secure Store Application ID here.


Drill down in to the database and find the table or view you wish to use.

Right click on the table or view and create a "New Read Item Operation"


Click next (you can name the operations in a way that makes sense to you).


Tick "Map to Identifier"

In my example I am only extracting one column of data and that is all that exists in my database view so I can only select that column which is "ContactGroup"

If you have multiple columns you need to decide on an identifer.

Click "Next"


Tick "Map to Identifier" on this screen too and select the identifier.

Now we need to create a second operation, so again right click on the table or view and select "New Read List Operation".


Click next (you can name the operations in a way that makes sense to you).


I am adding no filter at this point as I need all of the data to be displayed, however you can filter the data if required.


Click "Next"


Tick "Map to Identifier" and as in the previous operation and select identifier.

Click "Finish".

Configure the data source connection properties by clicking on the name.


Pay close attention to the "Authentication Mode" on both the default tab and in particular the client tab!


On the client tab add your Secure Store Application ID to allow the client to access the data.


Save the external content type.

Now the content type is created and configured we can use this within a SharePoint list.

From the view all site content type menu, click "Create".


 Select "External List"


 Name the list and click on the icon in the bottom right hand corner to view external content types.


Select the external content type from the list.


When you now open the list your data from the SQL server database shoud be visible!


I hope this helps with the basic principle of setting up an external content type and using that to display data from a nexternal source in a SharePoint list.

Thanks for reading!

Matt

Sunday 23 June 2013

Creating Views and Buttons or Tabs in InfoPath 2010

What I intend to show in this post is how to create some basic views of an InfoPath form and then add buttons to the main form that link to those views,

We can also make those buttons appear only when access to the views are required.

Start with a basic SharePoint list form – I’m using a custom list that I have added a few basic fields to.


The idea is to have a form that is as clean as possible and only shows fields that are essential.


So depending on the choice in my field “Article Type” I will make a different button appear which will take the form filler to a different view that contains the newly required field.


I have three choices for article type (Newspaper Article, Magazine Artilce, Webpage Artcle), and for each type I want a description. 

I want the different descriptions for each article type to be stored in a different field (Newspaper Description, Magazine Description, Webpage Description).


First we need to create a new view for each description type.


On the Page Design tab click ‘New View’.

Name the view.


You now have a new view, and this the view of the form that will open when the button we add is clicked.

I have repeated the last step three times so I have 3 views, one for each description type.


I have added a title and added a large text box field for this description type, If you are creating the field though InfoPath be sure to access the field properties after adding it to the form and name the field appropriately.
 
I have again repeated the above step so I have three views all with a different field added to capture the different descriptions.


As you can see I now have three views (top left) and I have the three correlating fields (bottom right) that I have added to those views.

Now I need to modify the default view to add the buttons that will navigate to the views.

Switch back to the default view.


Insert three buttons to the bottom of the form (or wherever you wish your buttons to appear).


 Select one of the buttons and right click, select ‘Button Properties’


I have renamed all of the buttons.


Select one of the buttons and ‘Manage Rules’.


From the new menu select ‘New’


I want to make all of the buttons hidden unless the corresponding ‘Article Type’ is selected so I need to set a formatting rule first to hide the button by default.

If you want your buttons visible at all times you can skip this formatting rule.


Click on the ‘None’ under condition to set a condition for the rule.

I have added a condition that if ‘Article Type’ is not equal to ‘Newspaper Article’

What I will do now is select to make this button hidden if that condition is true.


This means that by default the button will be hidden unless someone selects ‘Newspaper Article’ from the drop down menu.

I have repeated this step and added a formatting rule to hide each button.

If you view the form you will see the buttons do not appear by default.


If I select an ‘Article Type’ the corresponding button appears.


Next is to make the button link to the correct view.

Within the rules section for the button again, select new.

This time we need an ‘Action’.


We do not need a condition, by leaving it as none it will take the button click as a trigger for our action.

Set the action to ‘Switch Views’


Select the view that should open when the button is clicked.


I have repeated this step for all three so that all the buttons now have an action to switch to a new view.


 Click on the button to switch to the view.


You may wish to add a button to your views to switch back to the main form, or even to submit data.

Submit data is another action type in the rules I created in the created steps.


This is a very simple example of how you can use multiple views to simplify the user experience of a form by breaking the form into multiple views and only directing the form filler to views of fields when they are required to.

Hope this helps!